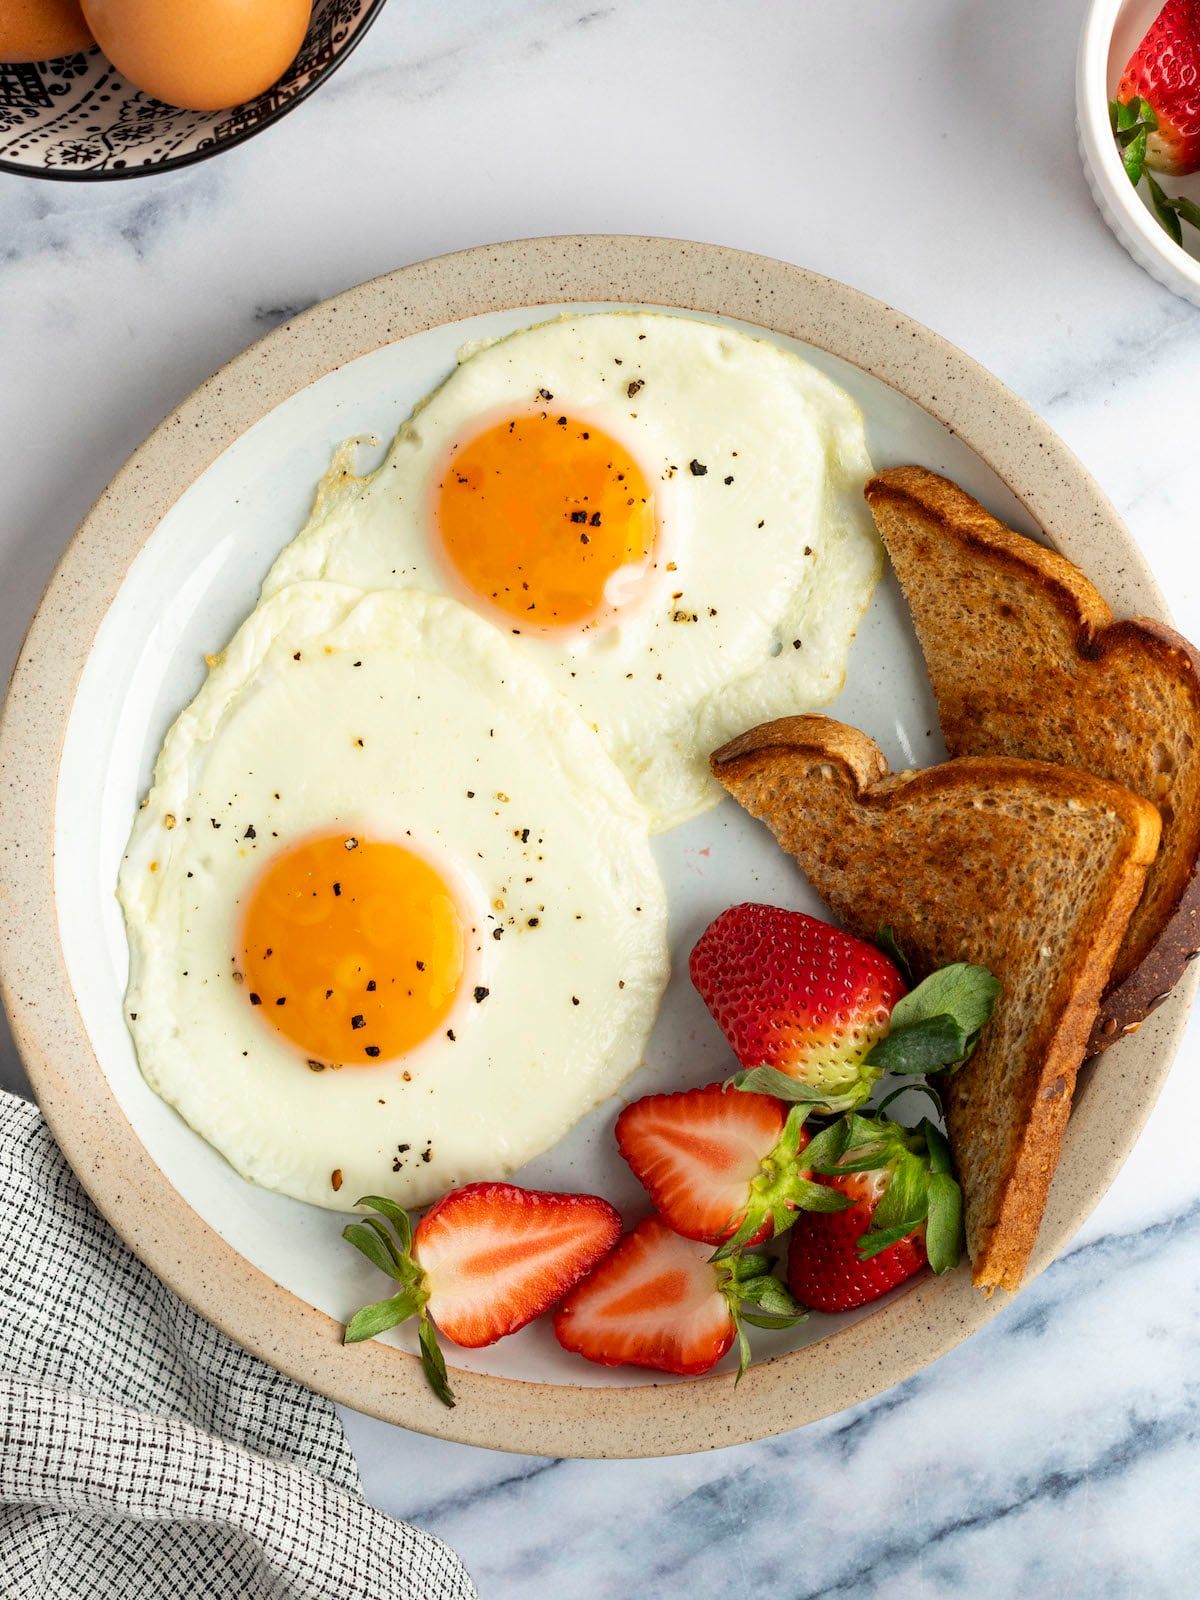
Unlock the Secret to Perfect Sunny Side Up Eggs
There are few culinary delights as universally loved and deceptively simple as a perfectly cooked
sunny side up egg. Imagine: a pristine, firm white cradling a vibrant, golden yolk, ready to burst forth with a rich, creamy cascade. This isn't just breakfast; it's an experience, a humble masterpiece that elevates everything from a slice of toast to a gourmet grain bowl. Many have attempted, and many have been frustrated, by the elusive balance of set whites and gloriously
runny yolks. But fear not! We're here to share an infallible method, a culmination of trials and triumphs, that will empower you to master the art of making
sunny side up eggs, perfect every single time.
Eggs, in their humble elegance, are undeniably one of nature's best foods. Beyond their sheer deliciousness, they’re packed with protein, vitamins, and minerals, making them a healthy and versatile addition to any diet. Whether nestled on a bed of fresh sourdough with creamy avocado, adding richness to a hearty breakfast sandwich, or simply enjoyed with a sprinkle of salt and pepper, the possibilities are endless. Our journey to perfecting these golden beauties stemmed from a common struggle: battling both overcooked, rubbery whites and stubbornly raw, unset tops. Through careful experimentation with temperatures, equipment, and timings, we've finally cracked the code to achieving those sought-after
runny yolks with beautifully set whites.
Essential Ingredients for Your Culinary Canvas
The foundation of any great dish lies in its ingredients, and
sunny side up eggs are no exception. While seemingly straightforward, choosing the right components makes a world of difference in taste and texture.
The Star: Fresh Eggs
Opt for the freshest, highest-quality eggs you can find.
Large, Grade AA eggs are generally recommended for their consistent size and robust yolks. Eggs from grass-fed chickens often boast richer flavor and deeper color, enhancing the overall experience. Fresher eggs also have tighter whites, which are less likely to spread thinly in the pan, contributing to a neater, more appealing final product.
The Medium: Butter or Oil
The fat you choose to cook your egg in plays a significant role in its flavor profile.
- Butter: For an unparalleled taste and a beautiful, slightly nutty aroma, real butter is often the preferred choice. It imparts a richness that complements the egg perfectly.
- Olive Oil: If you're looking for a lighter flavor or follow a dairy-free diet, extra virgin olive oil is an excellent alternative. Its fruity notes can add another dimension to your egg.
- Neutral Oils: Other neutral oils like canola or vegetable oil can also be used, though they offer less flavor contribution. For those on a dairy-free regimen, specialized dairy-free butters are also a fantastic option to achieve that buttery taste.
Regardless of your choice, ensure it's enough to lightly coat the bottom of your pan without drowning the egg.
The Finish: Salt, Pepper & Beyond
A simple sprinkle of salt and freshly ground black pepper is often all that's needed to enhance the natural flavors of your
sunny side up eggs. However, don't hesitate to get creative! Chili flakes can add a welcome kick, a pinch of garlic or onion powder can deepen the savory notes, and fresh herbs like chives or parsley can introduce a burst of freshness. Seasoning at the end allows you to control the exact amount and ensures the spices don't burn during cooking.
The Infallible Method: Step-by-Step for Flawless Sunny Side Up Eggs
The path to perfectly cooked
sunny side up eggs is simple, yet requires attention to detail. This method, emphasizing precise temperature control and the magic of a covered pan, guarantees success. For a quick reference, you might also find this useful:
Effortless Sunny Side Up Eggs: The Infallible 2-Minute Method.
1. Equipment Matters
The right pan is crucial. A
cast iron skillet offers excellent heat retention and distribution, leading to even cooking. Alternatively, a good quality
non-stick pan is equally effective, preventing sticking and making for easy egg removal. Choose a pan large enough to accommodate the eggs without them touching, allowing each to cook independently. A heavy, tight-fitting lid is also non-negotiable for this method.
2. Heat the Skillet: Low and Slow is the Key
Place your chosen skillet over
medium heat. Add your butter or oil and allow it to melt or warm up. The goal here isn't to get the fat sizzling, but gently shimmering. Once warm, immediately reduce the heat to
low. This step is critical. High temperatures lead to crispy, often burnt edges and can cook the underside too quickly while leaving the top raw.
Low heat ensures a gentle, even cook, allowing the whites to set gradually and the yolk to remain perfectly runny.
3. Crack and Cover
Carefully crack your eggs directly into the warmed fat, one at a time, ensuring the yolks remain intact. Avoid cracking them on the rim of the pan, as this can introduce shell fragments into your egg and unevenly break the yolk. Once the eggs are in the pan, immediately cover the skillet with your heavy lid. This is the secret weapon for achieving truly perfect
sunny side up eggs. The lid traps steam, which gently cooks the top of the egg, setting the whites without needing to flip or baste, while simultaneously protecting the delicate yolk from overcooking.
4. The Patience Game: Cook and Check
Let the eggs cook, undisturbed, for approximately
2 minutes over low heat, covered. This short duration is often all it takes. After 2 minutes, carefully remove the lid to check for doneness. The whites should be fully set, firm, and opaque, with no translucent areas remaining. The yolks, however, should still be beautifully golden and visibly runny, ready to burst. If the whites still appear a little too wobbly or translucent, recover the pan and cook for an additional 30 seconds to 1 minute, checking frequently. Remember, a little extra time on low heat is better than rushing and overcooking. For more detailed insights into this process, read our comprehensive guide on
How to Make Perfect Sunny Side Up Eggs Every Time.
5. Season and Serve
Once your
sunny side up eggs reach that ideal state, carefully slide them out of the pan onto a plate using a thin spatula. Season immediately with your preferred amount of salt and pepper. Serve without delay to enjoy the peak of their runny-yolk perfection.
Beyond the Basics: Expert Tips for Sunny Side Up Mastery
While the method above is foolproof, a few extra tips can elevate your
fried eggs from great to truly exceptional.
- Single Layer for Best Results: Avoid overcrowding the pan. Cook eggs in batches if necessary to ensure even heat distribution and consistent results.
- The Gentle Crack: Crack eggs on a flat surface, like a countertop, rather than the rim of the bowl or pan. This creates a cleaner break and reduces the risk of shell fragments or yolk breakage.
- Warm Eggs: Some chefs prefer to bring eggs to room temperature before cooking, believing it promotes more even cooking. While not strictly necessary for this covered-pan method, it can contribute to consistency.
- Slight Pan Tilt: After adding the fat, tilt the pan gently to ensure the entire cooking surface is lightly coated, preventing any part of the egg from sticking.
Elevate Your Plate: Serving and Pairing Suggestions
The beauty of
sunny side up eggs lies in their versatility.
- Classic Breakfast: Serve on buttered toast, alongside crispy bacon or sausage, and a side of fresh fruit.
- Avocado Toast: Elevate your avocado toast with a perfectly cooked egg on top, allowing the yolk to meld with the creamy avocado.
- Grain Bowls: A sunny side up egg is a fantastic topper for a healthy grain bowl, adding protein and richness. Think quinoa, roasted vegetables, and a drizzle of sriracha.
- Sandwiches: Tuck an egg into a breakfast sandwich with cheese and ham, or add it to a gourmet burger for an extra layer of decadence.
- Salads: A warm, runny yolk can act as a natural dressing for a fresh green salad.
While leftover cooked eggs can be stored in an airtight container in the refrigerator for a day or two,
sunny side up eggs are truly best enjoyed fresh off the pan, when their yolks are at their most gloriously runny and the whites are tender.
Conclusion
Mastering the art of
sunny side up eggs is a culinary milestone that brings immense satisfaction. By focusing on fresh ingredients, utilizing a low and slow cooking temperature, and harnessing the power of a covered pan, you can consistently achieve that coveted balance of perfectly set whites and irresistibly
runny yolks. This isn't just about cooking; it's about transforming a simple ingredient into a moment of pure enjoyment. So, grab your skillet, crack those eggs, and prepare to elevate your everyday meals with this infallible method. Happy cooking!