The Quest for Perfect Sunny Side Up Eggs: Your Infallible 2-Minute Method
Few things bring as much simple joy to a meal as a perfectly cooked egg. Among the myriad ways to prepare this culinary marvel, the sunny side up egg holds a special place, beloved for its shimmering, runny yolk and delicate, set whites. Whether gracing a breakfast plate, nestled in a hearty grain bowl, or adding a luxurious touch to a sandwich, perfect sunny side up eggs are a versatile delight. However, many home cooks can attest to the struggles: eggs with crispy, burnt edges, bottoms that stick stubbornly to the pan, or worst of all, raw, uncooked whites atop a still-runny yolk. Achieving that elusive balance – a fully set white and a warm, liquid gold yolk – can seem like a daunting task. But what if we told you there was an infallible method, one that consistently delivers perfection in just about two minutes? You're about to discover the secrets to truly effortless sunny side up eggs, transforming your kitchen into a breakfast haven.The Foundation: Essential Ingredients for Sublime Sunny Side Up Eggs
Success in the kitchen often begins with quality ingredients. For sunny side up eggs, simplicity reigns, but the choice of each component plays a crucial role in the final flavor and texture.Choosing Your Eggs Wisely
The star of the show, naturally, is the egg itself. For the best sunny side up experience, opt for fresh, large eggs. Look for Grade AA if possible, as these typically have firmer whites and yolks that hold their shape better. Eggs from pasture-raised or grass-fed chickens often boast richer, more vibrant yolks and superior flavor, which makes a noticeable difference. The fresher the egg, the tighter its white will cling to the yolk, resulting in a more appealing presentation and better cooking consistency.
The Perfect Fat: Butter, Oil, or Both?
The medium in which your egg cooks impacts both taste and texture.
- Butter: Frying sunny side up eggs in butter imparts an unparalleled richness and a delicate, nutty flavor that many find irresistible. Real butter also helps achieve those slightly crispy, golden edges without burning.
- Extra Virgin Olive Oil (EVOO): For a lighter, dairy-free alternative or a distinct Mediterranean flavor profile, EVOO works beautifully. It provides a different kind of richness and can contribute to a slightly crispier edge if desired.
- Neutral Oils: Options like avocado oil, grapeseed oil, or canola oil are excellent if you want the egg's pure flavor to shine through without additional buttery or olive oil notes.
- Dairy-Free Butter: If you follow a dairy-free diet, high-quality dairy-free butter alternatives are a fantastic way to replicate the buttery taste and texture.
Seasoning to Perfection
While the egg's natural flavor is paramount, judicious seasoning elevates the experience.
- Salt and Pepper: A simple sprinkle of flaky sea salt and freshly ground black pepper is often all that's needed to enhance your sunny side up eggs. Add them *after* cooking to prevent the salt from drawing moisture out of the egg too early.
- Beyond the Basics: Don't be shy about experimenting with other seasonings. A pinch of chili flakes for heat, a dash of garlic or onion powder for depth, or a sprinkle of fresh chives or parsley can transform your eggs into something truly special.
The Infallible 2-Minute Method: Your Step-by-Step Guide to Perfect Sunny Side Up Eggs
This is where the magic happens. By carefully following these steps, you'll master the art of mastering sunny side up eggs, achieving those coveted runny yolks and perfectly set whites every time.- Gather Your Equipment: You'll need a cast iron skillet or a good non-stick pan (a 6-8 inch pan is ideal for 1-2 eggs), and critically, a heavy, well-fitting lid for your skillet. The lid is non-negotiable for this method.
- Heat the Skillet and Fat: Place your skillet over medium heat. Add about 1 teaspoon of butter or oil per egg. Allow the butter to melt completely or the oil to warm up. Tilt the pan to ensure the bottom is evenly coated.
- Lower the Heat – This is Crucial: As soon as the fat is warm, reduce the heat to low. This step is paramount. High heat leads to crispy, burnt edges and uneven cooking. We want a gentle sizzle, not a frantic fry.
- Carefully Crack the Eggs: Gently crack each egg directly into the skillet, one at a time. Be careful not to break the yolk. Give each egg some space; overcrowding the pan can lead to uneven cooking. If cooking more than two eggs, consider using a larger pan or cooking in batches.
- The Magic of the Lid: Immediately after cracking the eggs, cover the skillet with its heavy lid. This is the secret weapon! The lid traps steam, creating a mini oven effect that gently cooks the top of the egg without needing to flip it or introduce any aggressive direct heat. This ensures the whites cook evenly and thoroughly while the yolk remains perfectly runny.
- The 2-Minute Timer: Let the eggs cook undisturbed for exactly 2 minutes over low heat, covered.
- Check for Doneness: After 2 minutes, carefully remove the lid. The whites should be fully set, opaque, and firm, while the yolks should still be beautifully golden and liquid. If the whites still appear slightly raw or translucent, recover the pan and cook for an additional 30 seconds to 1 minute, checking frequently. Remember, you're aiming for firm whites and runny yolks.
- Season and Serve: Once cooked to perfection, carefully slide the sunny side up eggs onto a plate, one at a time, using a thin spatula. Immediately sprinkle with salt and pepper to your liking. Serve hot and enjoy!
Elevate Your Egg Game: Expert Tips for Consistently Perfect Sunny Side Up Eggs
While the 2-minute covered method is highly effective, incorporating these additional insights will ensure your sunny side up eggs are flawless every single time.Equipment Matters: Choose Your Pan Wisely
Your choice of pan is more than just a surface. A cast iron skillet, when properly seasoned, offers excellent heat retention and even cooking, contributing to a superior crust (without burning). A good non-stick pan is also a fantastic choice, especially for beginners, as it minimizes the risk of sticking and makes cleanup a breeze. Ensure your pan is large enough to accommodate your eggs without them touching, allowing for optimal heat distribution.
Temperature Control is Paramount
We've stressed low heat, but let's reiterate *why*. High temperatures cause the egg proteins to seize up too quickly, leading to rubbery whites and often, burnt bottoms and crispy edges while the top remains stubbornly uncooked. Low heat allows the egg to cook gently and evenly from the bottom up, with the steam from the lid finishing the top, resulting in that tender, set white and warm, runny yolk.
Don't Skip the Lid!
The lid is the unsung hero of this method. It transforms your skillet into a convection oven, trapping steam that circulates and cooks the top of the egg gently. This allows the white to set completely without requiring a flip (which would break the yolk) or basting with hot oil. It's the key to achieving that perfectly opaque, firm white without overcooking the delicate yolk.
The Fresher, The Better
Fresh eggs are not just about flavor; they're about structure. Fresher eggs have tighter, thicker whites that hold their shape better around the yolk, creating a more attractive, compact sunny side up egg. Older eggs tend to have thinner, more spread-out whites, which can be harder to cook evenly.
Avoid Overcrowding Your Pan
Resist the urge to cram too many eggs into a single pan. Overcrowding lowers the pan's temperature and releases too much moisture, leading to steamed (rather than gently fried) eggs and uneven cooking. For best results, cook one or two eggs at a time, allowing each to have ample space.
Beyond Breakfast: Creative Ways to Enjoy Your Sunny Side Up Eggs
While a classic breakfast staple, sunny side up eggs transcend the morning meal. Their versatility is truly impressive:
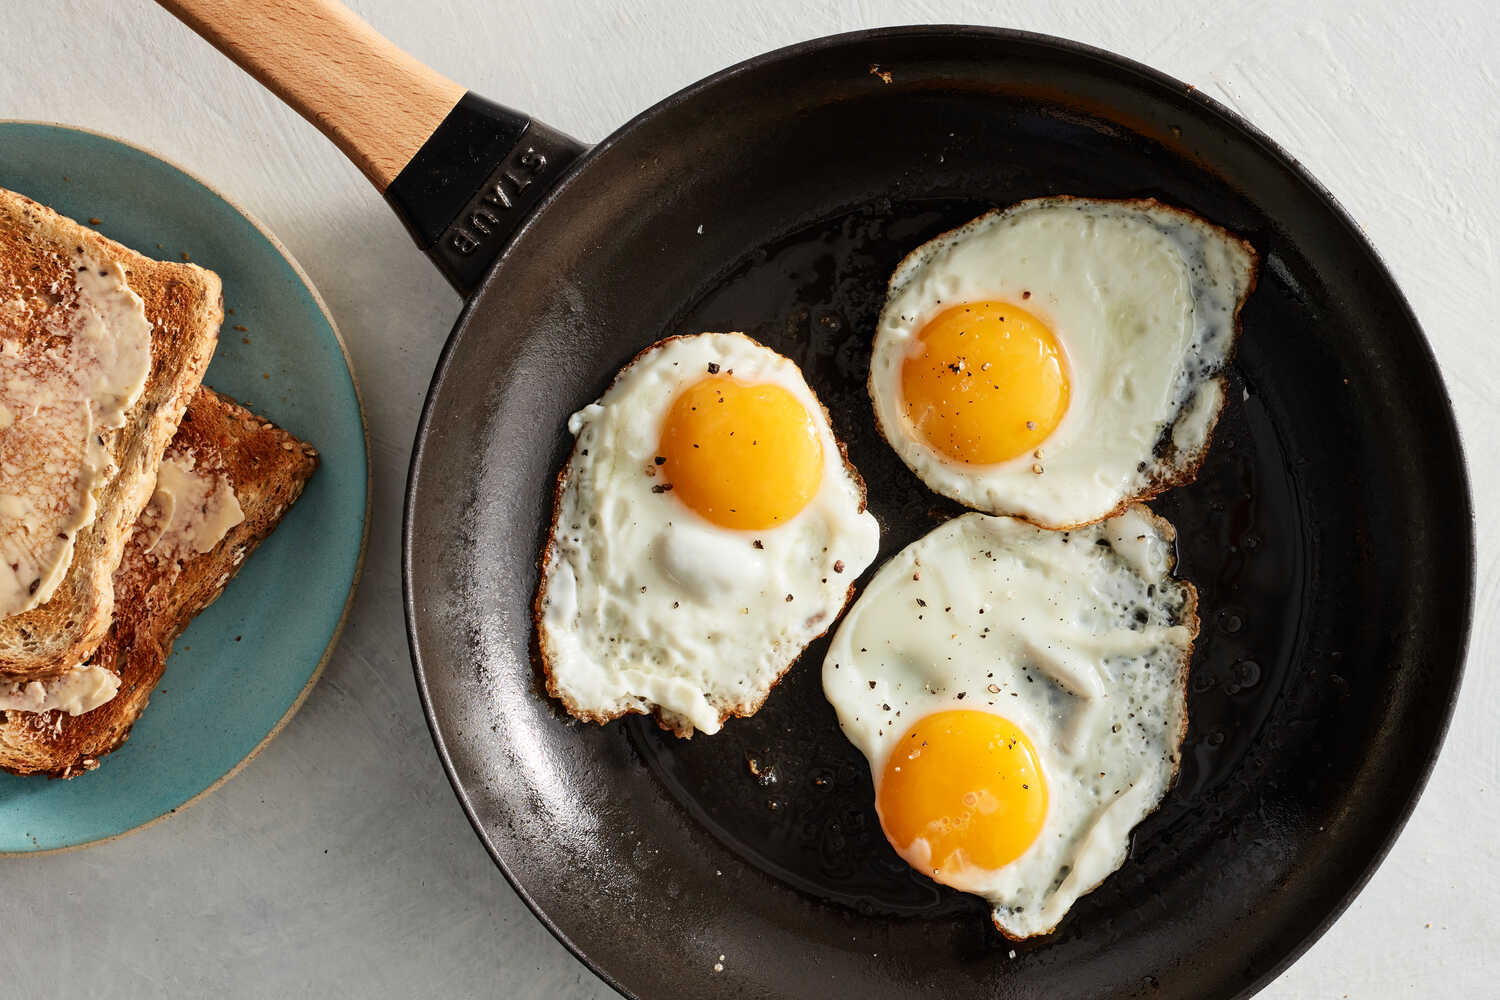
- On Toast or Avocado Toast: The quintessential pairing, perfect for dipping.
- Grain Bowls: Top a warm bowl of quinoa, rice, or farro with roasted vegetables and a sunny side up egg for a complete and satisfying meal.
- Salads: A warm, runny yolk drizzled over a fresh green salad (like a Caesar or spinach salad) adds richness and transforms it into an entrée.
- Burgers and Sandwiches: Elevate your next burger or deli sandwich with a glorious sunny side up egg.
- Pasta Dishes: A sunny side up egg can turn a simple pasta dish into a carbonara-esque delight, with the yolk creating a creamy sauce.
- With Leftovers: Revitalize yesterday's roasted vegetables or stir-fry with a fresh sunny side up egg.
While sunny side up eggs are best enjoyed immediately, any rare leftovers should be cooled completely, transferred to an airtight container, and refrigerated for no more than 1-2 days. However, for true perfection, they are a dish meant to be savored fresh off the pan.
